アドセンスに審査に通過したら、広告を設置していきましょう。
※このプラグインの導入は広告を貼る前に行えばOKです。
プラグイン「WP QUADS」を導入することで
広告を手軽に設置することができます。
 AYA
AYAこの記事では、WP QUADSのインストール方法を紹介します!
WP QUADSをインストール・有効化する
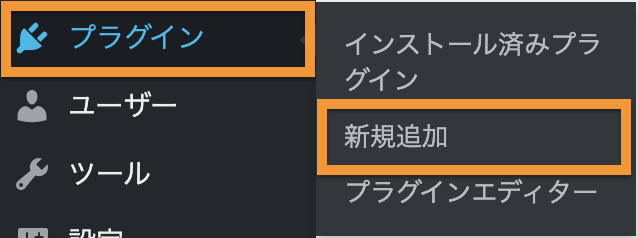
「プラグイン」>「新規追加」をクリックしましょう。
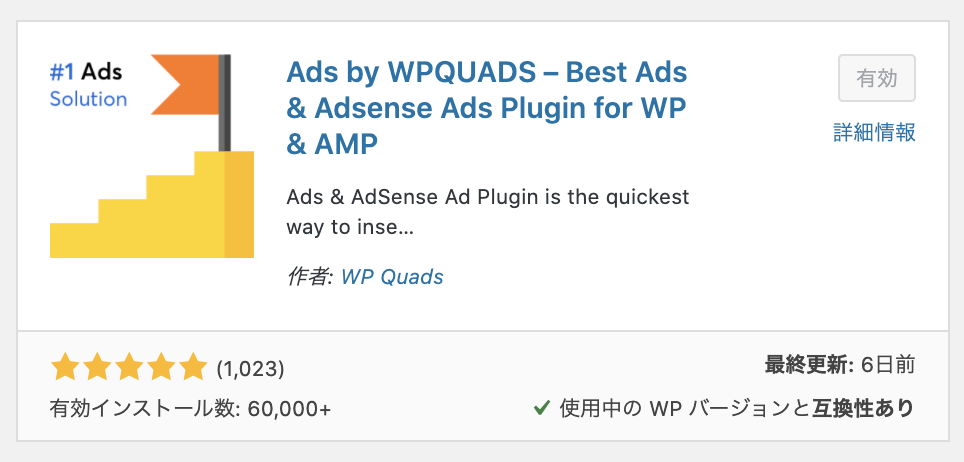
「WP QUADS」をインストール・有効化します。
WP QUADSを設定する
WP QUADSを旧画面に戻す
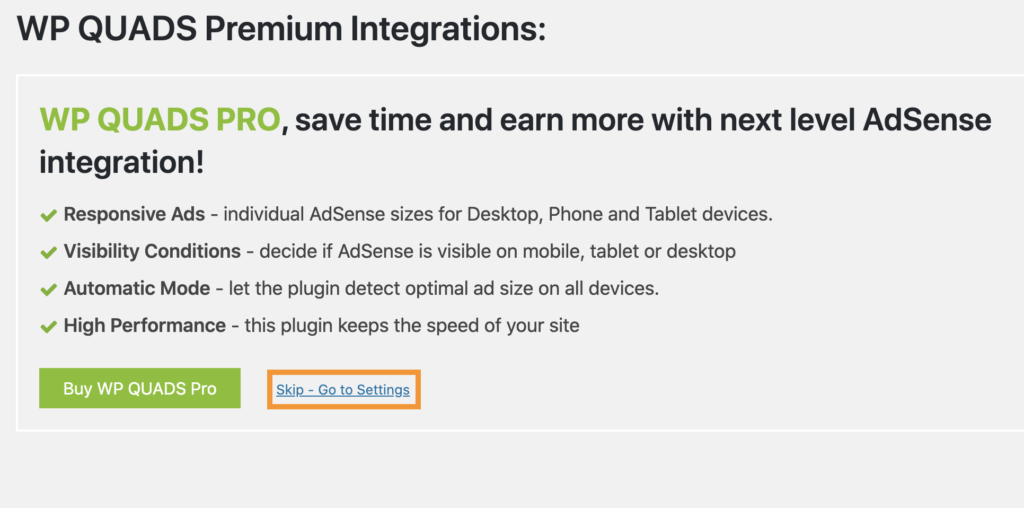
「WP QUADS」を有効化すると
以下のページに移動します。
「Skip – Go to Settings」をクリックします。
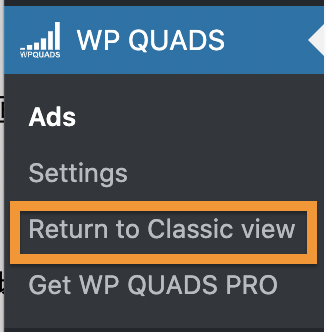
「ダッシュボード」>「Return to Classic view」をクリックします。
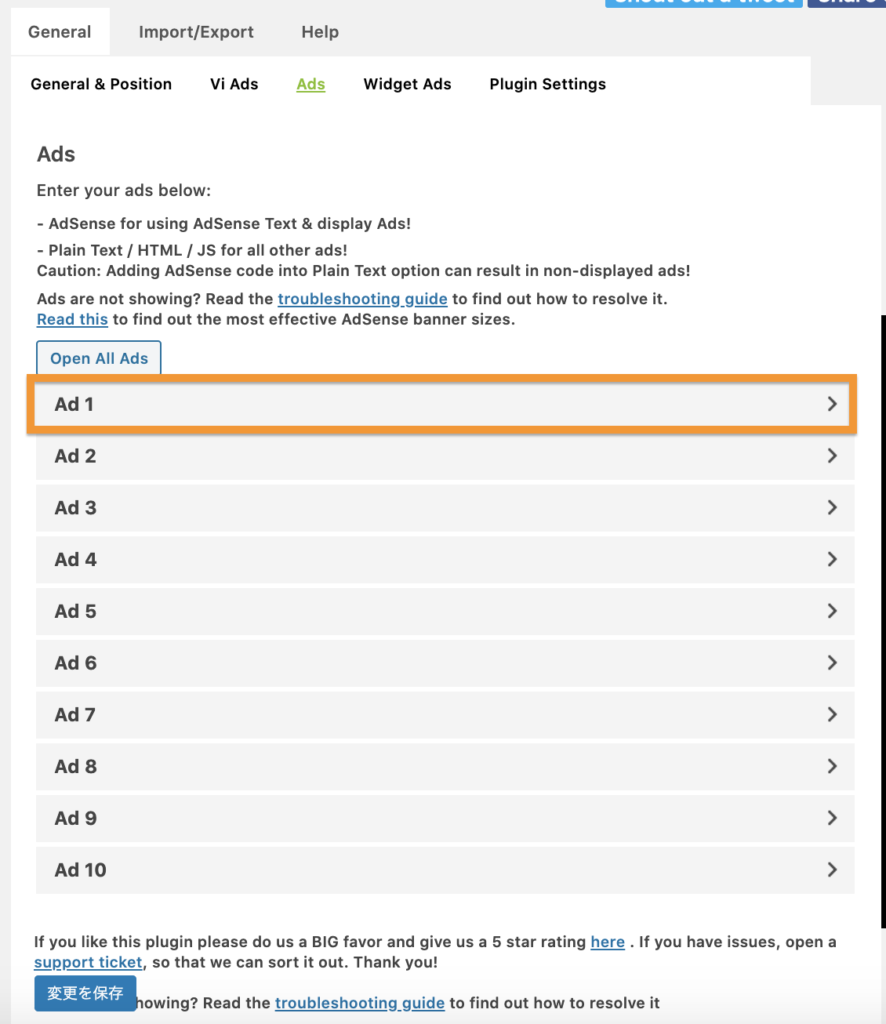
「Ads」を設定する
「Ads」をクリックします。

「Ad1」タブをクリックする。
「Adタブ」で広告を設定する
「Adタブ」で広告を設定しましょう。
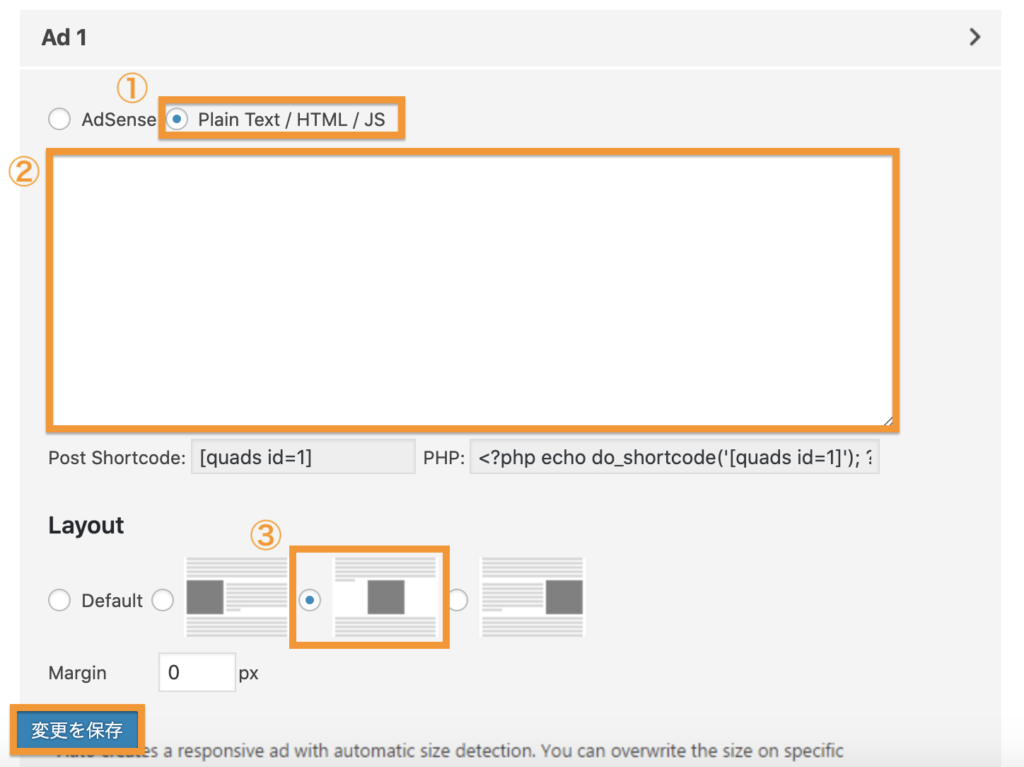
- Plain Text / HTML / JSを選択
- 広告コードをペースト
- 中央寄せを選択する
それぞれ同じコードを使用することもできますが、
「記事上」「記事中」「記事下」と広告を置く位置ごとに
広告コードを発行して設定をしましょう。
後ほど、どの位置においた広告が収益率が高いのか統計を取りやすくなります。
この手順で、アドセンスコードを「Ad10」まで10個設定することができます。
まずは「Ad5」まで設定しましょう。
「General & Position」を設定する
「GENERAL&POSITION」の設定をしましょう。
「End of Post」にチェックを入れ、
「Ad ◯」を選択し、設定を保存しておきましょう。
この設定をすることで、
記事の一番下に自動的に広告が挿入されるようになります。
WP QUADSを使って記事に広告を貼る方法
WP QUADSの登録が済んだら、
記事に広告を貼りましょう。
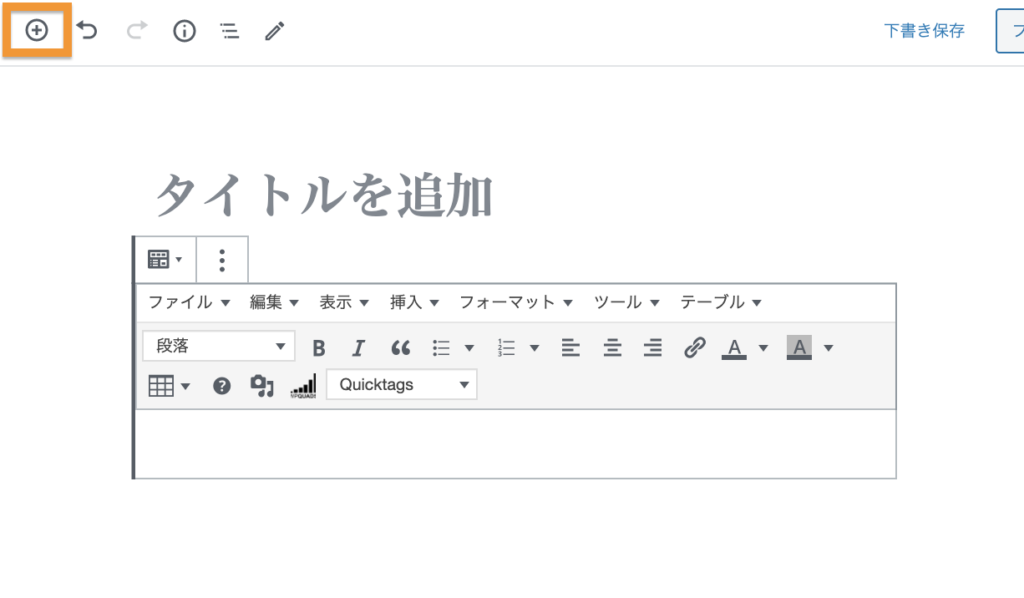
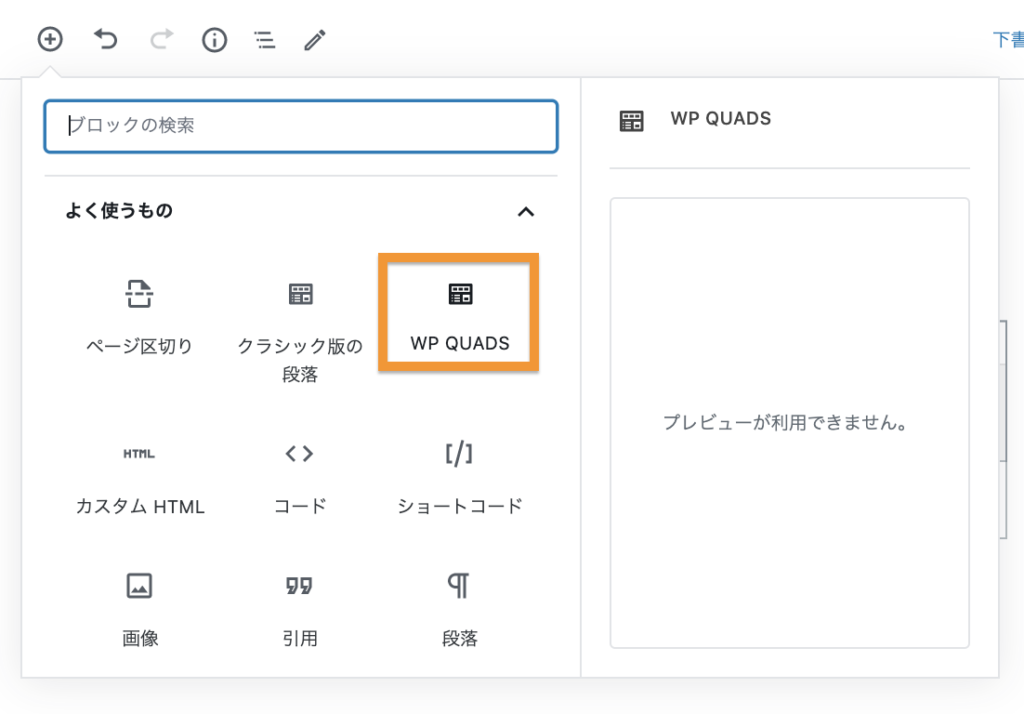
記事制作画面の
「左上のプラスボタン」をクリックします。
「WP QUADS」を選びます。
「Ad 1」をクリックします。
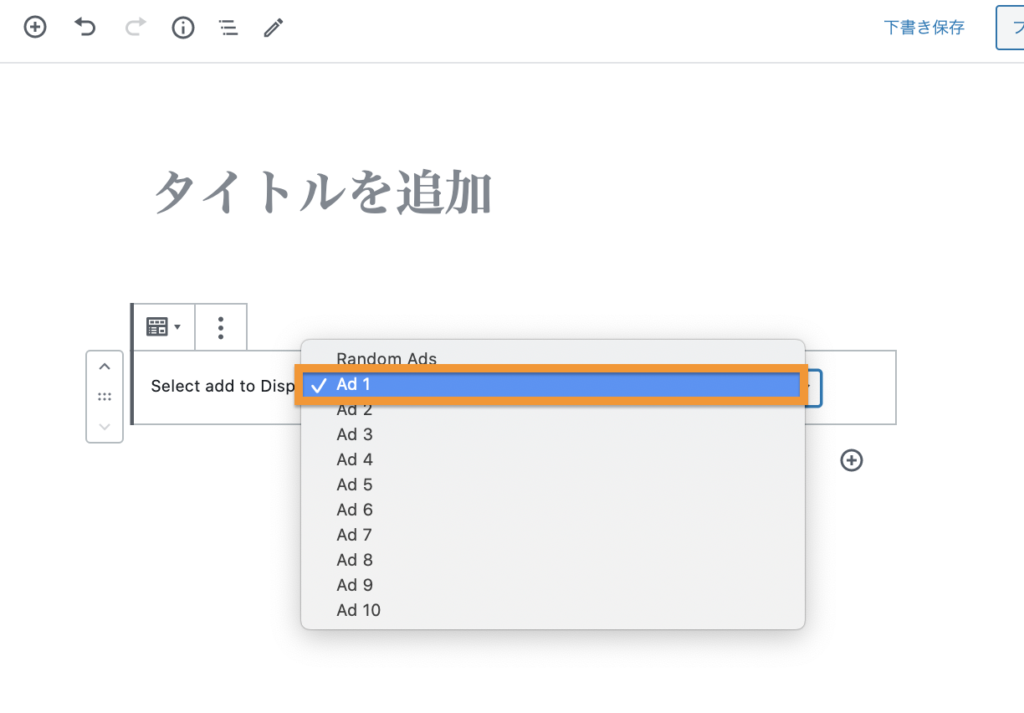
これで記事への広告設置は完了です。
WP QUADSを使ってサイドバーに広告を貼る方法
サイドバーにも記事を貼っていきましょう。
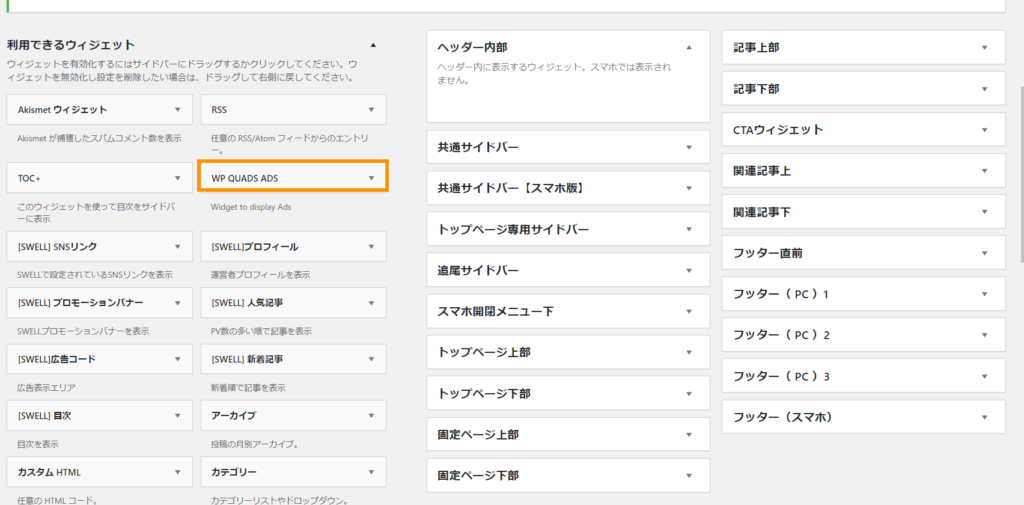
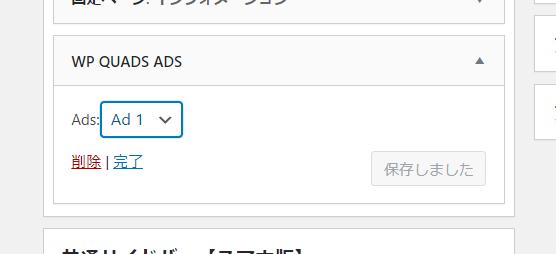
「外観」>「ウィジェット」を開きます。
「WP QUADS ADS」の▼をクリックします。
「共通サイドバー」を選択し、「ウィジェットを追加」をクリックします。
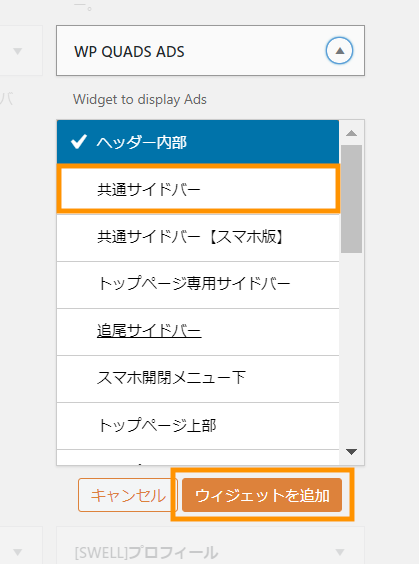
サイドバーに追加できたら、サイドバーに配置したい広告を選択します。
 AYA
AYAこれで簡単に広告挿入はバッチリです!